It is an undeniable fact that the mid-market publishers have always been looking for the ideal CPM ad networks to partner with. You can’t settle with just Google Adsense. Agreed, finding the best alternative ad network is easier said than done. However, it isn’t really hard to improve your ad revenues, when you know the market well. We work with publishers across the globe and help them monetize their content. Hence, we believe we are the best source to get you the right info on this topic.
Is the Ad Network right for me?
Although it is necessary to partner with the ad networks, you need to ensure that they are the right choice for you. We helped a handful of publishers to increase their ad revenue by up to 80 percent by allowing them to go beyond the ad networks.
How can you know what’s right for you? The answer is straightforward. What’s your monthly traffic?
- If it is lesser than 1 Million page views, the list is for you. Go ahead.
- If it is greater than 1 Million page views, we need to talk. We have better options for you including direct deals, private marketplaces, and user-based ad refreshing. Reach us today.
You know CPM Ad networks pay you based on the impressions you deliver. Let’s say you gave them 10,000 impressions and your CPM is $5, then they’ll pay you $500 in total. So, keep an eye on traffic all the time. After all, even the best ad network won’t be able to help you, if your traffic is sinking every day.
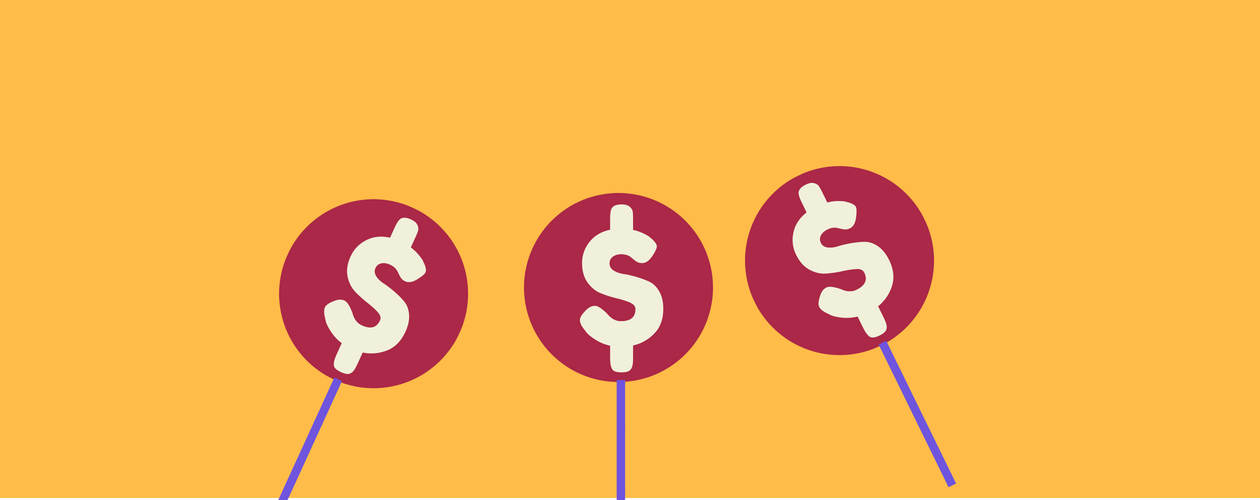
Best CPM Ad Networks For Publishers
1. Media.net
Media.net is one of the leading ad networks with a global presence and premium partnerships. They run the world’s #2 largest contextual ads program from Yahoo! Bing Network Contextual Ad network. Besides, they have the proven track record of helping long-tail publishers to increase their CPMs.
In order to get approval from them, businesses are required to have original content, which must be updated often, and intellectual property rights must not be violated in the process.
Pros
- You get a Personal Account Manager.
- Payment is sent after the payout has reached $100.
- Payment via Wire Transfer, PayPal.
- Customer support is good.
Cons
- Needs the majority of the traffic from tier-1 countries.
Is it right for you?
If you’re an original publisher with frequent content updates and tier-1 traffic, jump right into the network.
CMP Rates
You’ll likely to get around $1 to $1.5 CPM and car loan, health insurance, mortgage, and credit loan niches are proven to perform better.
2. Adbuff
Adbuff is a well-performing CPM ad network which uses its real-time bidding (RTB) technology to increase CPMs. In fact, Adbuff is considered the best AdSense alternative. The platform allows the advertisers to bid in real-time for your inventory, thus improving your revenue.
Pros
- An extremely advanced Real-time dashboard, which provides real-time reports.
- Personal account manager for every publisher.
- Sign-up bonus and higher CPMs.
- As they accept publishers with original content and tier-1 traffic, ads are expected to be relevant and verified.
Cons
- 2000 unique visitors per day
- NET45 payment; not monthly as others.
Is it right for you?
If you’re looking for a premium ad network which can pay you higher CPMs, then Adbuff is the right one for you.
CPM Rates
$0.50 to $3 for tier 1 traffic and most probably, it’ll be around $0.30 to $0.40.
3. BuySellAds
With BuySellAds, you can generate revenue, as soon as you are ready to run ads. There are no minimum requirements and conditions to partner with the ad network. They enable advertisers to buy impressions on your website using their platform. For instance, a healthcare company can select any health-oriented websites and choose to pay based on impressions. If it isn’t available, they can switch or wait until the current campaign is finished.
Pros
- Relevant, quality, and targeted ads.
- In the case of PayPal, the minimum payment threshold is just $20
- You can get the payment within 2-3 working days of making the request. No delay.
Cons
- Prices are non-negotiable
- They take 25% of your revenue, which a bit higher the market standard (20%).
Is it right for you?
If you’re working with a new blog, then BuySellAds might be right for you.
CPM Rates
CPM varies from $0.25 to $2.25 and usually stays around $0.75.
4. Conversant Media
Conversant Media is a well-known ad network and has been around for 20 years. They have bagged many premium publishers, possess a diversified portfolio, and accept only top level domains.
Pros
- Diverse types of ads are available in accordance to your needs
- The minimum payment threshold is a mere $25.
- The publisher can be paid through PayPal, or a cheque can be sent to him/her.
Cons
- It yields better results only for high traffic websites.
- The website should be in English.
Is it right for you?
We believe it is the next best option to Adbuff. They’re capable of running decent ads and generate consistent revenue.
CPM Rates
$0.50+ eCPM for banners and skyscrapers.
$3.00+ eCPM for pop-unders (Chrome blocks it by default, so not a good format to go with).
5. Criteo
Criteo runs an advanced marketplace dedicated to publishers with over 17000+ retail and brand demands. You can set a floor price on the platform, which means you’ll get what you deserve. If the buyer isn’t willing to pay above, it will be passed down to other ad networks, so no wastage.
Pros
- Extremely competitive CPM rates
- Approval is easy.
- Varied ad formats (from native ads to IAB standards to your own).
- Asynchronous/Synchronous ad tags.
- Criteo algorithm determines and displays the right products for your readers.
Cons
- The minimum payment threshold is $150, which is high.
- Doesn’t use popular payment methods.
- Customer support is available through email.
Is it right for you?
Criteo is right for everyone. If you’re getting accepted, we advise you to try them out along with AdSense and other ad networks. They are proven to increase CPMs for any publisher.
CPM Rates
Criteo usually has the better CPM. It ranges from $1 to $5. If you’re getting a tier 1 traffic and have a niche audience, you’re the right fit.
6. Propeller Ads
Propellers ads offer a huge array of ad products including Popunder ads, interstitial ads, dialog ads, and standard banner ads. They’re popular among the download and streaming sites. However, they can pay you a higher CPMs as AdSense, depending on your users’ geo. Obviously, you can do better, if you have a good traction from the US and UK.
Pros
- Easy to join.
- Real-time reporting.
- They give 80% of the revenue to the publishers.
- Payment methods – Wire Transfer, Payoneer.
Cons
- Your reader may not love to see popunder or full-screen ads at all. So, lousy user experience and higher bounce rates.
- Doesn’t support PayPal payment mode.
Is it right for you?
Only if you’re having good traffic from the US, UK, and Canada.
CPM Rates
$0.50 to $1.00 for most of the websites. Some niches like file sharing can get over $1.50 CPM.
7. Exponential (Formerly Tribal Fusion)
Exponential, a quality-centric marketplace for both publishers and advertisers offers custom tailored plans to help you monetize. Starting from basic set up to direct deal opportunities, you can choose your own plan and experience the potential of the ad network accordingly.
Pros
- Provides elevated CPM rates.
- An extensive variety of options for ads.
- You get the payment after 45 days
- The ads are of high-quality
- The minimum payment threshold is a just $50
- Payment methods – PayPal, Cheque.
- A huge opportunity to earn revenues with the help of extremely targeted ads.
Cons
- It is extremely difficult to get accepted.
Is it right for you?
If your traffic is over 500,000 uniques per month, you can surely give it a go.
CPM Rates
CPM varies from $0.20 to $2 and technology niche will get you the best CPM in this ad network.
8. Revcontent
Revcontent is a content recommendation network, which was established in 2013. Revcontent takes in websites which are of high quality, and get a minimum of 50,000 visitors in a month. They offer a set of ad widgets (native, non-native, custom API) for publishers to place along the content.
Pros
- Great support team.
- Provides premium CPM rates for all nations.
- Can monetize your mobile sites too.
- Quality content recommendations.
- Extremely precise, real-time reporting dashboard.
- The minimum payment threshold is a mere $50.
Cons
- High minimum traffic requirement
- It is extremely hard to join, as many applications are rejected because of the quality issues.
Is it right for you?
It’s one of the best alternatives to AdSense. If you are getting approved, then you should try it.
CPM Rates
The average CPM of Revcontent network is $0.44, but it can go up to $3.
9. Adcash
Adcash, an ad network known for monetizing gaming vertical claim to fill your inventories 100% of the time. They offer dynamic CPM optimization to ensure better monetization and user experience. However, you can opt-in for the manual process too.
Pros
- Easy approval.
- There is no minimum traffic requirement in order to get approval.
- Supports diverse languages.
- Personal Account Manager.
- Contact Support is good, and easy to get in touch with.
- Let’s you to control your ads manually
- Numerous payment systems are available.
Cons
- The minimum payment threshold is $100.
CPM Rates
CPM rates of Adcash is highly volatile going from $5 to over $10.
10. AdBlade Network
Adblade is popular among the publishers for its content-style ads, which receive higher clicks from sponsored content. Besides, they offer display ads and sponsored ad formats along with DMP. They prefer quality publishers with a minimum of 500,000 monthly pageviews.
Pros
- The AdBlade ads can be run together with Adsense.
- Unique Ad formats.
- Quality ads.
Cons
- Low acceptance rate.
- The minimum payment threshold is $100.
CPM Rates
CPM is $2 on average and it will increase if you have the tier 1 traffic and tech-related content.
11. RhythmOne (Formerly RadiumOne)
RhythmOne is a public advertising company founded in 2004. It went by a few names (Blinkx and RadiumOne) and now resides among the leading CPM ad networks around the globe. It offers a variety of ad formats for publishers including video ads, and rich media ads. Besides, it has the demands to fill your mobile impressions too.
Pros
- Availability of demands and Ad formats.
- Higher CPM rates
- Timely payment through PayPal, Wire, or ACH.
- RTB-based buying and selling.
Cons
- Minimum amount to cashout is $100.
- Net60 payment cycle.
- Require 5000 unique visitors per month to join the network.
Is it right for you?
RhythmOne has the technology to track users across the devices and hence, can deliver relevant ads to your users and it maintains its quality. If your audience is targeted to a niche, you can give it a try for sure.
CPM Rates
The average CPM for US traffic is over $1 and usually plummet by up to 50% for other countries.
12. HilltopAds
HilltopAds reportedly delivers 12 billion monthly impressions to its network and a go-to choice for long tail and mid-market publishers. It provides an internal ad server and a clean interface to get you started on monetization. In addition, you can utilize their real-time optimization system to increase eCPM.
Pros
- Beginner-friendly.
- Internal Ad Server and Real-time Optimization
- Net7 payout via PayPal, Wire, ePayments, Bitcoin.
- 24*7 support.
Cons
- Fewer ad formats.
- Relatively new to digital advertising space.
CPM Rates
For tier 1 traffic, CPM ranges from $3 to $5 while tier 2 and 3 traffic can you below $1.
13. RevenueHits
RevenueHits is a subsidiary of Intango Ltd, the world’s leading media tech company. Although they’re new to the ad tech ecosystem, they serve publishers seamlessly with the help of their self-serving model. As a publisher, you have access to a huge set of ad formats (Shadow box, Slider, Notifier, to name a few) and can fill your mobile impressions.
Pros
- Higher CPMs for tier-1 traffic.
- Uses both CPC and CPA model.
- Net30 payout cycle.
- Self-serving platform.
- Optimization system to find the best paying ads.
Cons
- Lack of information on the technology.
- No information on the demands.
Is it right for you?
They’re CPM rates for high for selective formats like Pop-under. So, if you want to try them, you can go ahead. But, do consider the influence of user experience while testing the network.
CPM Rates
Over $1.5 in US, UK, Germany, and Canada. Traffic from the rest of the world can get you around $0.5.
14. UberCPM
UberCPM is one of the fastest growing ad networks, which is best for small as well as medium-sized publishers. The ad network has a faster approval system and gives 80% of the revenue to the publishers. Noticeably, there is no minimum traffic requirement for you to pair with UberCPM. This, in turn, makes it harder to get quality ads and premium rates for your impressions.
Pros
- No minimum traffic requirements.
- Monthly payout via PayPal.
- Real-Time Statistics and Reports.
Cons
- The ads are irrelevant.
- CPMs are comparatively lower.
- Slower ad loads.
Is it the right one for you?
If you’re running a website with lesser traffic, then you can try it out. However, as we mentioned before CPMs are unreliable. So, test the CPMs often.
CPM Rates
CPM rates of UberCPM network tends to be low for tier 2 and tier 3 traffic. For the US, average CPM is $0.5.
Conclusion
As you know, there’s no one-size-fits-all solution in adtech. The best way is to experiment. However, it is important to know how to properly experiment. Cutting off the ad networks abruptly might put a big hole in your revenue. Go through and decide what’s right for you. And, then start with a few CPM ad networks at first. Test, measure, and optimize.


